Well, having painted a lot of Romans, it was time for my newly raised legion to see a battlefield, to face the revolting Britons of the Andycenii tribe. Both sides selected their forces (well, I just used everything I had painted and based). The force lists are below. It would be a first tester game of rules converted from Soldiers of God (my Crusades rules) … to Soldiers of Rome (WIP).
The game’s card system allows both sides to fight with a very different character hard-wired into the game, and so I think works well in periods when different ‘doctrines’ of warfare are facing-off against eachother. In SoG, that is the western tradition of the heavy knights charging against the eastern tradition of horse archers (and running away) and those different dynamics makes for a much more interesting/tactical historical game I think, with the armies actually fighting more like they did, but not removing all tactical control from the players.
Today, it would be the organised, disciplined and versatile Roman legion, well-equipped to face any threat and with no real weaknesses (beyond a lack of cavalry), facing the aggressive barbarian hordes, powerful in the attack and at the charge, but lacking in discipline. They have a few ‘tactically’ useful other assets too, like their excellent abilities to ‘initimidate’ their enemies as well as just kill them (one of their main 'weapons'), with various units with Fearsome and Terrifying Reputations, and tough leaders that are good combat units in themselves but must be seen to be involved in the Melees or it cost the barbarians army morale (i.e. Warlord's whose men are fighting have to fight to too, no lurking at the back). The system is still in development and so a few things would be discussed and changed on the outcome of this play-test, but with a new deck of action cards, I was confident it would feel like I wanted it too.
We both pre-chose our battle plans for the game. I went on the defensive, expecting a barbarian rush, and chose to ‘Hold the Line’. My centre would be held by my auxilaries, slingers and my scorpios, with legionaries just on either side. The plan was that once the enemy centre attacked (it was the obvious route of attack across the most open ground, the flanks had hills and woods), then my flanks would swing in and snap shut like jaws… a trap to lure him in then crush him from left and right. My auxilaries would be hard-put to it to hold out long enough for the heavy infantry to arrive to win the day, but you have to take some risks and can’t be strong everywhere. I wasn’t planning on just sitting back and letting the charging enemy completely have the initiative. Interestingly, I we both liked this, we chose our battle plans after we had seen the terrain and chosen sides. To me this made sense, to appraise the ground then decide how best to use (or ignore) it. We could both see the fastest route was across the centre, through the cornfields, and planned accordingly.
The enemy, well, they kept it brutally simple, an 'all out attack' by the hairy tribemen, his main combat strength of naked Fanatics, Nobles and supporting Warriors led by his feted leader (whom he had upgarded to a Chosen Champion of the Gods, turning him - actually her - into a potent combat monster atop her speeding chariot). For the Andycenii, it was all or nothing, either they breakthrough in the centre, or they would lose.
Roman Legion
Centre Battle
Commander (mounted)
2 Units of Auxiliary Spearmen
2 Units of Auxiliary Slingers (skirmishers)
3 Scorpios
1 Legionary Cohort
Left Battle
Commander (on foot)
2 Legionary Cohorts
1 Unit of Auxilary Cavalry
Right Battle
Commander (on foot)
3 Legionary Cohorts (1 had the Aquila Party upgrade - our eagle was present)
Andycenii Tribe
Centre Battle
Warlord on a Chariot (Chosen Champion of the Gods i.e.Nutter!)
1 Unit of Noble warriors (on foot and including a Carnyx band, for making a din)
2 Units of Tribal warriors
1 Unit of Fanatics
1 Unit of Chariots
Baggage Train guarded by 1 unit of armed civilian levy
Left Battle
Warlord on foot
1 Unit of Tribal warriors
3 Units of Slingers
Right Battle
Shaman Commander on foot
1 Unit of Fanatics
2 Units of Chariots
1 Unit of Wardogs
1 Unit of mounted Warriors (light cavalry)
To War…
Horns blaring, wild chanting, naked fanatics wailing and cavorting, the barbarian enemy started the game by beginning their headlong advance across the table. In the centre the Warlord (Warlord-ess - is that a thing?), led the way like an avenging Fury atop her chariot, she streaked out in front of the others screaming for vengeance… (for what I’m not sure, maybe she overpaid on her taxes!). To me, it looked like a fearsome lot of bearded, semi-clad men, and I already felt my cunning plan might not be enough to stop their rush. My brave auxiliares headed out to meet the centre and slow them down a bit, whilst my two flanks cautious advanced a bit too, ready to snap shut, except for the auxiliary cavalry that streaked off on the far left towards the woods, now resounding to the barking of hunting dogs and the woops of chariot riders heading their way. My cavalry had to hold out to avoid my line being outflanked on the far left and rolled up… a tough mission for my poor light cavalry, but they would fient, and run and generally be a pain to avoid combat.
My Scorpios opened fire, but one broken on a special event card (‘Paulinus, I warned you not to over-tension that bow string!’). I lost a third of my firepower but the last two inflicted multiple hits on the enemy warriors. My slinger’s stones had little affect. Combat was first joined by the charging Warlord chariot, she leap down from it to attack a few skirmishing slingers, called out a challenge (a special event card), promptly won it and decapitated a poor auxilary messily… morale badly shaken, the slingers miraclously stood and fought on. But not for long, when the fanatics next slammed into them and butchered them all in a very gory massacre… oh dear…
Meanwhile my first unit of tougher auxiliary spearmen met the charging warriors and in a flurry of javalin-chucking and spear jabbing won their fight and then gradually got the better of the warriors who, disordered by the auxiliary’s counter-charge and a 'Shaken' special event, then broke and routed - hurrah.
On the far left my out-numbered cavalry fell back (ran away), leading the pursuing chariots and wardogs on, who then charged - drat, he'd got some good cards to catch me out. My cavalry met the attack well, inflicting heavy damage on some good rolls, and to my suprise stood their ground. The Celt’s light chariots are treated as light cavalry really, so look scary as models, but actually are fast and mobile but lack any big punch. The wardogs, well, they are a one trick unit, one good charge is all you get and they can never rally any disorder either, so once used they lack any extra bite… my far left had held. Phew, thanks the much maligned Equites.
But the centre was the crucible of this battle. The Andycenii nobles charged my other slingers and soon routed them in another pitiless bloody massacre - what could we do against such wreckless violence? Well, get stuck-in is one answer. My first legionary cohort charged the Nobles, gave them a good volley of pilum and plunged in with gladius. The Nobles are a tough combat unit (but the Celts only get 1 in smaller games), and they had some light chariots fighting in support, so it was a close fight. Both sides inflicted heavy damage, then used Rally action cards to recover it. It would now be long slog and looked like a stalemate between well-matched forces. Legionary cohorts are very resilent and tough to break…
Meanwhile, the screaming harpy-woman on her chariot rumbled on, swing hard-left through a woods and flanking my scorpios, which were blazing (twanging) away for they were worth and scoring a lot of hits on the on-rushing fanatics, who just didn’t care about all the impaled and dead guys that resulted… and they charged on, over-runing my first poor scorpios crews who were beset from two sides by maniacs! My reserve auxiliary spear unit rushed in to help and a big central melee developed, eating up most of both side’s cards for the next few turns.
Now the time was ripe for my flank cohorts to move in and crush them in my vice… the plan would come to fruition… except I drew no action cards that allowed me to move my units for 3 turns. (I should have held on to a Charge card for the time it was needed, but under pressure I had used the one I held earlier to fight with). My flanks, my main combat force, failed to react. The fight in the centre was a desperate struggle, I used all my cards to keep my outmatched auxiliaries in the fight and hope that next turn would give me the move cards I need… it didn’t (twice).
No!!! The legionaries stood and watched, no orders to advance reached them in the choas of battle and no damned March or Charge! cards to help me. Curses… Mars had deserted me.
Next turn, I finally got a Manoeuvre and March card and the right flank started to swing in as fast as it could, but it was too late to reach the fighting and change the course of the battle. The last of my scorpios were overrun, its crew all dying in another bloody massacre and my brave auxiliaries then routed too due to the fanatic's wreckless attacks, that broken my overall army morale, and my centre battle had been all put swept away.
Sound the retreat… time to withdraw.
The Romans had lost, quite badly - eek… I had only broken 2 enemy units (the warriors my auxiliaries defeated and a small unit of skirmishing chariots that deserted on a special event and trundled off home to put the dinner on). In my defence before the Senate... I had lost no legionary cohorts and my eagle still stood, but the thin auxiliary screen in the centre had been smashed to peices in three blood massacres… and that Warlord-woman had taken her bloody revenge… she was personal involved in two of those massacres… one scary lady.
As a play-test it was great, 3 hours of fighting ad a few things needed altering, and the idea that wardogs should be scarier to enemy cavalry that infantry I liked (big dogs effectively being wolves to horses). A few other minor tweaks and the game will be in very good shape. I need to play a few more test games though. Rome won’t stand for such savagery against its brave soldiers, a few reinforcements will be sent (i.e. painted), and I shall launch a brutal punitive expedition against the Andycenii’s homelands… at least that scary chieftain-woman has to die… or be dragged in chains through the streets of Rome.
The most pleasing part was the feel, the barbarians looked like a horde and felt and fought like it, but stoic defence will stop them. My opponent said after deployment he looked at the table and thought we’ll never break all those Romans… so if we both felt under some pressure, then that’s a good start. The real reason for my defeat was I tried to do something a bit too clever with the state plan I had, not playing to its strengths and the action cards I could rely on. For that plan I need a stoic defence in the centre (with a Rally card) and movement cards for the flanks. Instead, I was trusting to good fortune, and it didn't come.
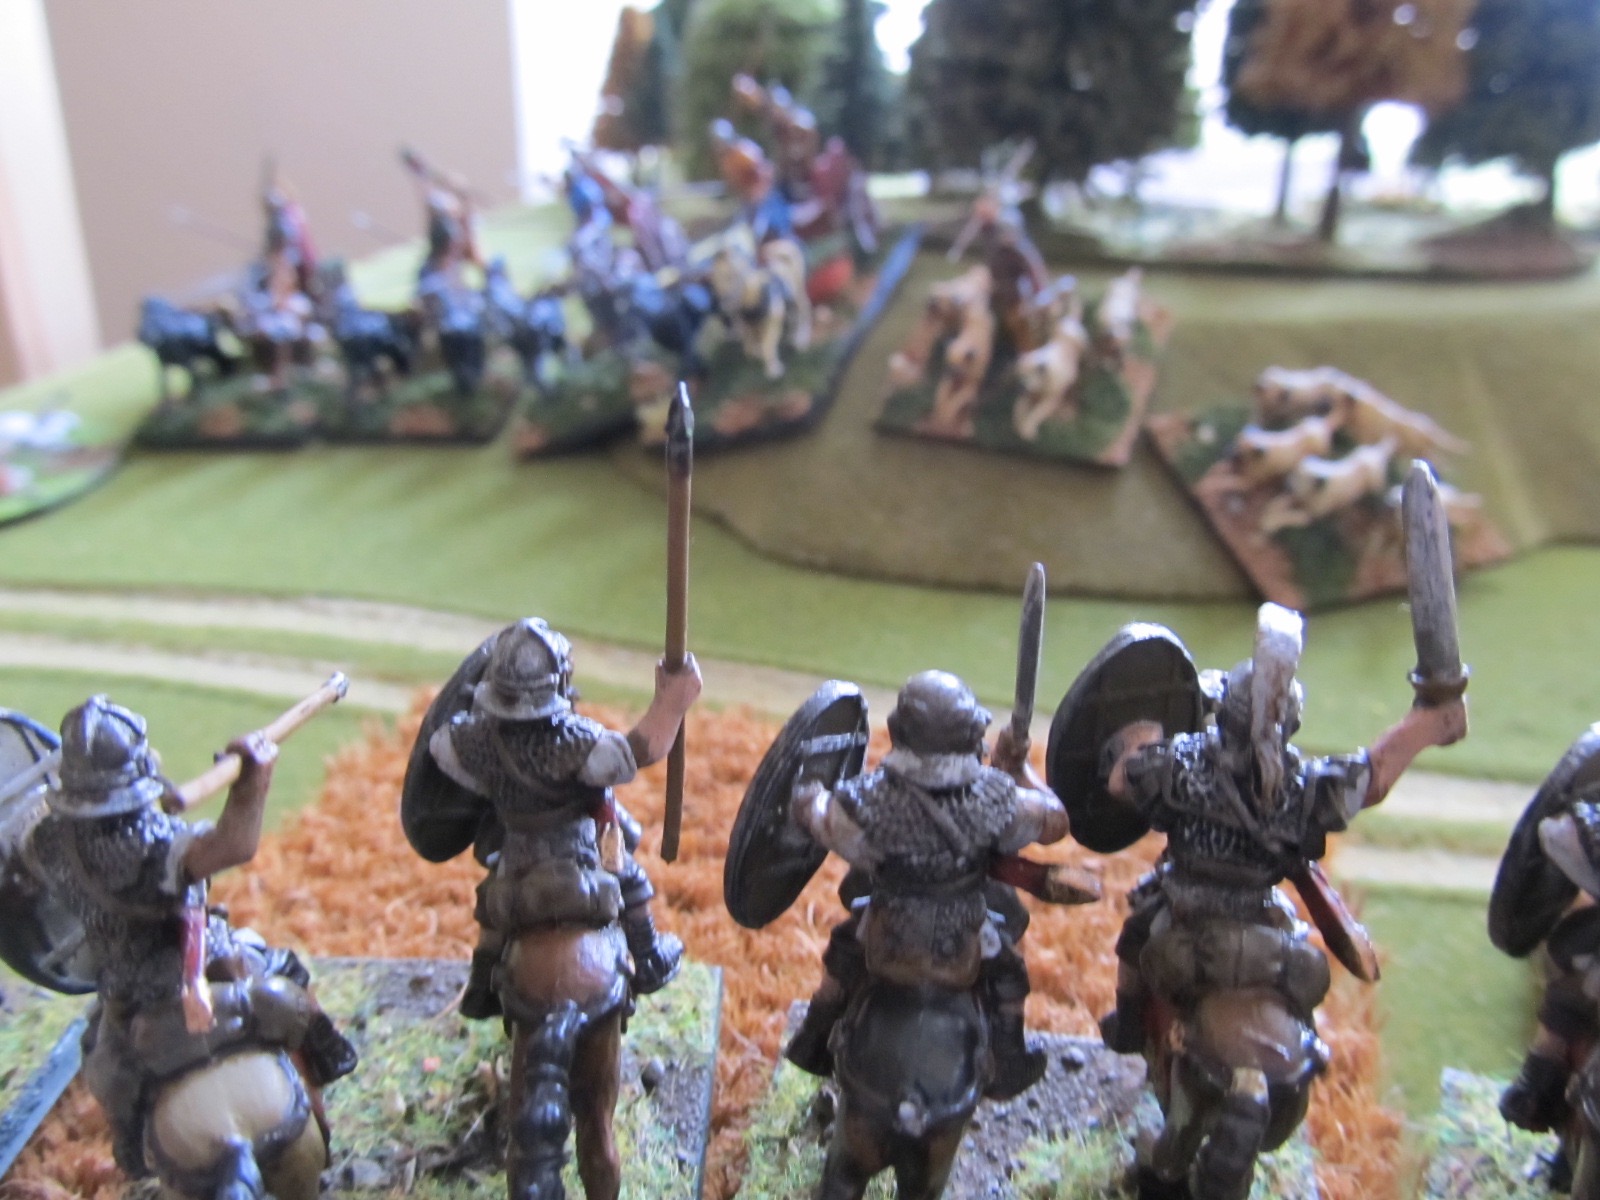
Here are some snapshots of the game in progress, not to many, I was too busy playing…
Well there would be if my blog would upload pictures... pictures to follow soon due to a technical fault... by Google. WTF... grrr! How do I get in touch with technical support?? See next post.